Installation
Thanks to awesome Theme Installation. You will be able to install theme in the fastest and the easiest way. There are every section is individual highly customizable using elementor page builder. You can easily setup every sections separetly. Check out now!
- Log into your WordPress back-end
- Navigate to Appearance Themes
- Click Install Add New
- Click Upload Theme
- Now you just need to find the “strick.zip” in the Upload folder and hit Install now.
- After Installed then click Active Now
If you are experiencing any issues during the installation I would recommend to check out this Screencast by Envato
Theme Installation From FTP
The second option how to install this Theme would be the upload via FTP manager. It really dosen’t matter which of the two ways you choose, just choose the one you feel more comfortable with.
- Login to your FTP account and navigate to your WordPress Installation directory
- Navigate to the folder /wp-content/themes
- Upload the “Strick” folder (not the .zip-file). This is the folder located inside the “Upload” folder in the zip-file you’ve downloaded from Themeforest.
- Now log into your WordPress backend
- Navigate to Appearance Themes
- Find the Theme and click Activate
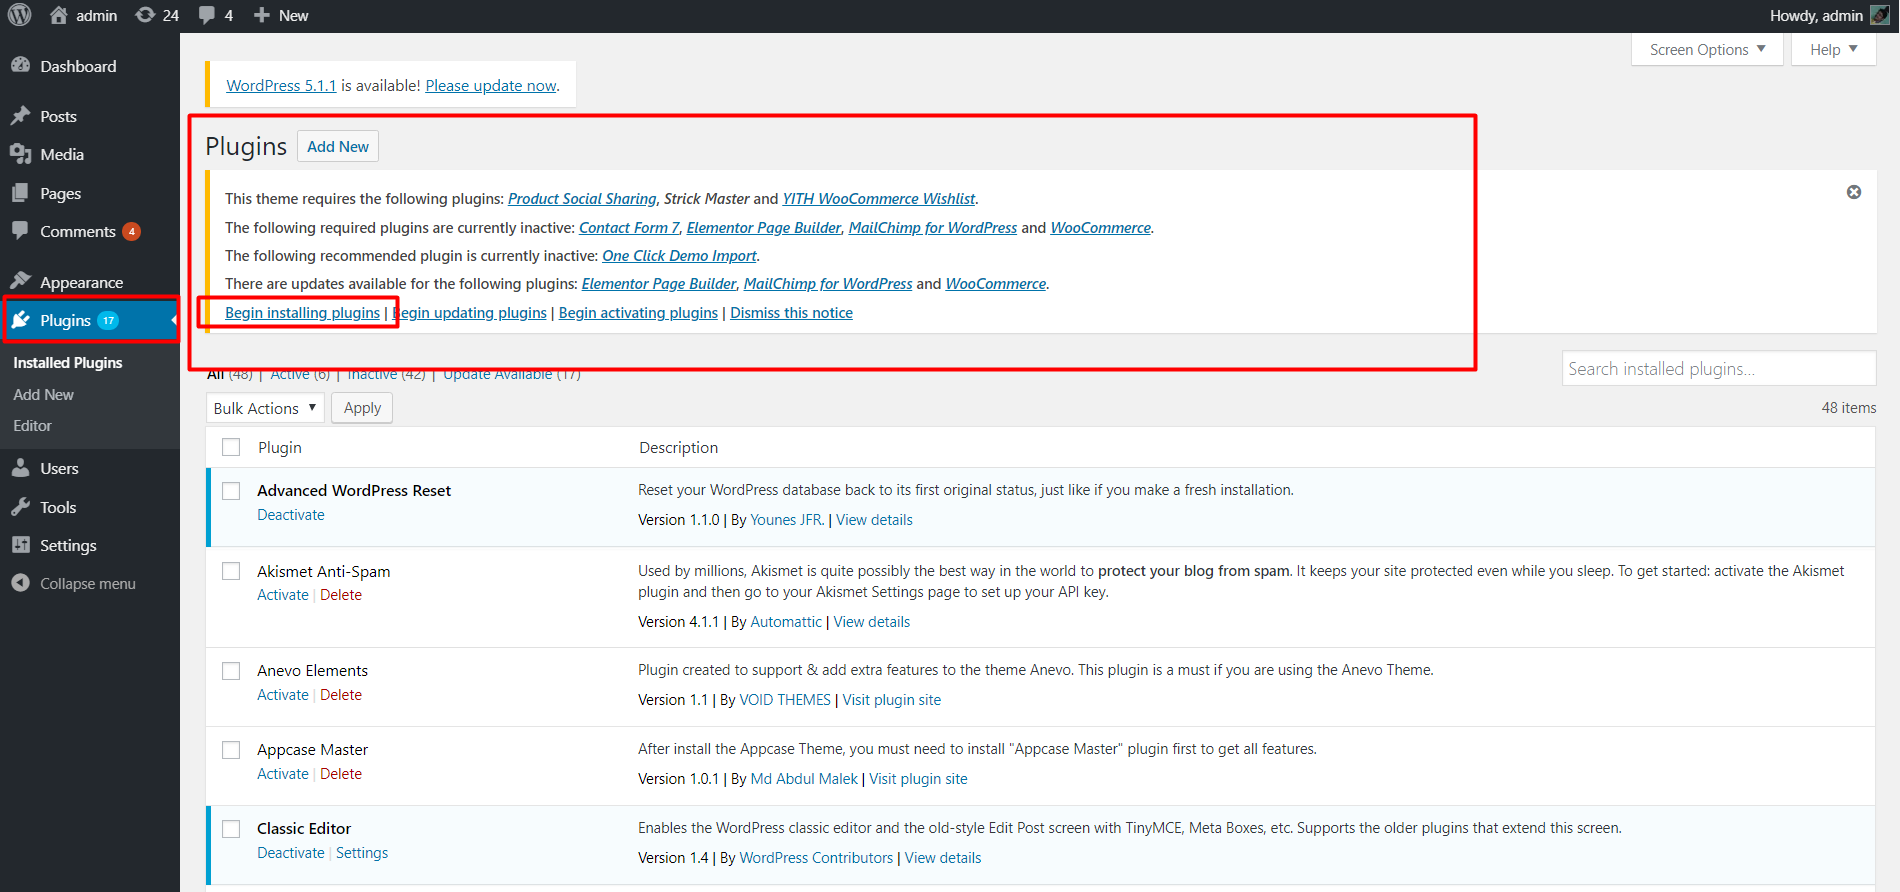
Plugin Installation
So at this stage you have probably noticed a warning, asking you to install recommended plugins. This is needed to get required red sign plugins Strick Master, Contact Form 7, MailChimp for WordPress etc. Installing that is very simple, you just need to click Begin installing plugins and you will be redirected to the plugin installation page where you can install Plugins.
Strick Master
The main required plugin for the theme to function correctly work and to match up with other plugins and settings
Contact form 7
Contact Form 7 can manage multiple contact forms, plus you can customize the form and the mail contents flexibly with simple markup. The form supports Ajax-powered submitting, CAPTCHA, Akismet spam filtering and so on.
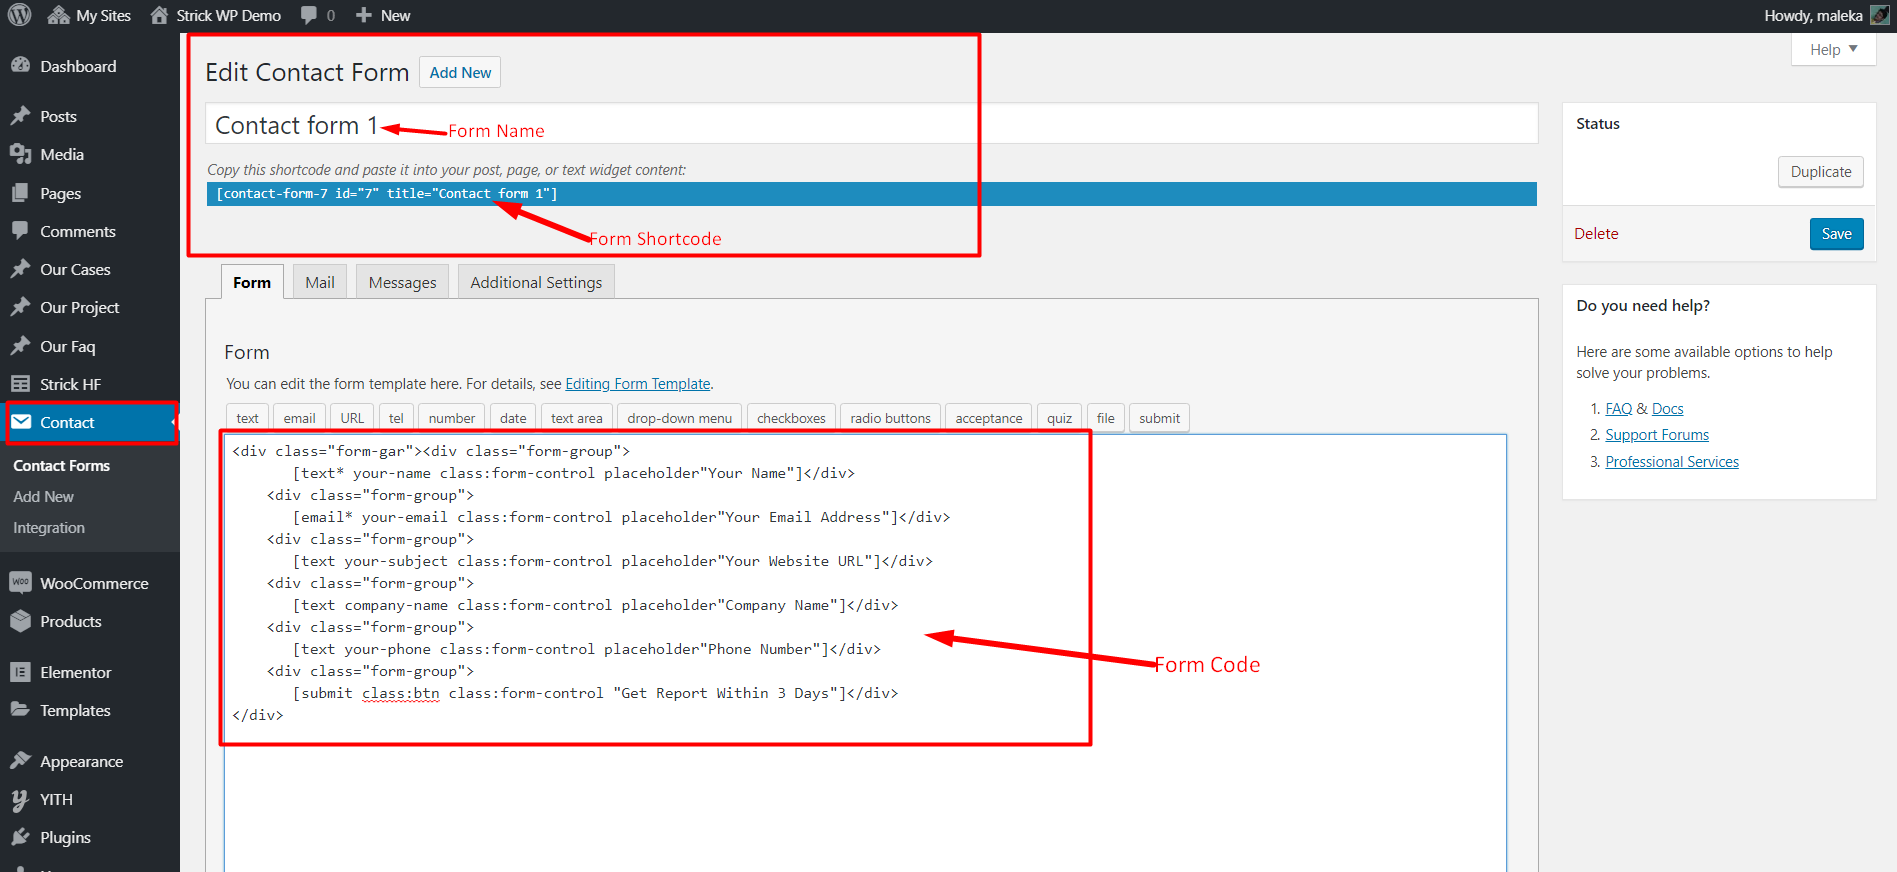
Contact form 1 raw code (Copy & Past it for your cf7 form build)
This form used in contact us page 1 form
<div class="form-gar"><div class="form-group">
    [text* your-name class:form-control placeholder"Your Name"]</div>
  <div class="form-group">
    [email* your-email class:form-control placeholder"Your Email Address"]</div>
  <div class="form-group">
    [text your-subject class:form-control placeholder"Your Website URL"]</div>
  <div class="form-group">
    [text company-name class:form-control placeholder"Company Name"]</div>
  <div class="form-group">
    [text your-phone class:form-control placeholder"Phone Number"]</div>
  <div class="form-group">
    [submit class:btn class:form-control "Get Report Within 3 Days"]</div>
</div>
Contact form 2 raw code (Copy & Past it for your cf7 form build)
This form used in contact us page 2 form
<div class="cf">
  <div class="row">
    <div class="col-md-6"><div class="form-group">
       <label>Your Name*</label>
       [text* your-name class:form-control placeholder"Your Name Here"]
    </div></div>
    <div class="col-md-6"><div class="form-group">
       <label>Email Address*</label>
       [email* your-email class:form-control placeholder"Email Address Here"]
    </div></div>
    <div class="col-md-6"><div class="form-group">
       <label>Subject Line*</label>
       [text your-subject class:form-control placeholder"Subject of Message"]
    </div></div>
    <div class="col-md-6"><div class="form-group">
       <label>Telephone Number*</label>
       [text your-phone class:form-control placeholder"Phone Number"]
    </div></div>
    <div class="col-md-12">
       <div class="form-group">
          <label>Your Message*</label>
          [textarea your-message class:form-control placeholder"Write Your Message"]
       </div>
       <button type="button" class="cf-btn">Send Now</button>
     </div>
  </div>
</div>
Contact form 3 raw code (Copy & Past it for your cf7 form build)
This form used in home 5
<div class="sscf">
    <div class="form-group">
       [text* your-name class:form-control placeholder"Website URL"]
    </div>
    <div class="form-group">
       [email* your-email class:form-control placeholder"Your Email Address"]
    </div>
    <div class="form-group">
       <button type="button" class="btn-style-b">Check Now>/button>
     </div>
</div>
More Details
MailChimp for WordPress
News Letter Subscription plugin to get subscription form, needs mailchimp api to be working. Just make the form inside mailchimp plugin and add the classes from our from there. After getting the api key from your mailchimp account your should see list of all your created forms in mailchimp. So now go to form and select a subscription from the list and create a form. Replace that form with the following code
Mailchimp raw code
<div class="nl-content">
  <div class="nl-form">
   <div class="input-group">
         <input type="email" class="form-control" placeholder="Enter your email">
        <span class="input-group-btn">
          <button class="btn" type="submit">Subscribe</button>
        </span>
    </div>
  </div>
</div>
More Details
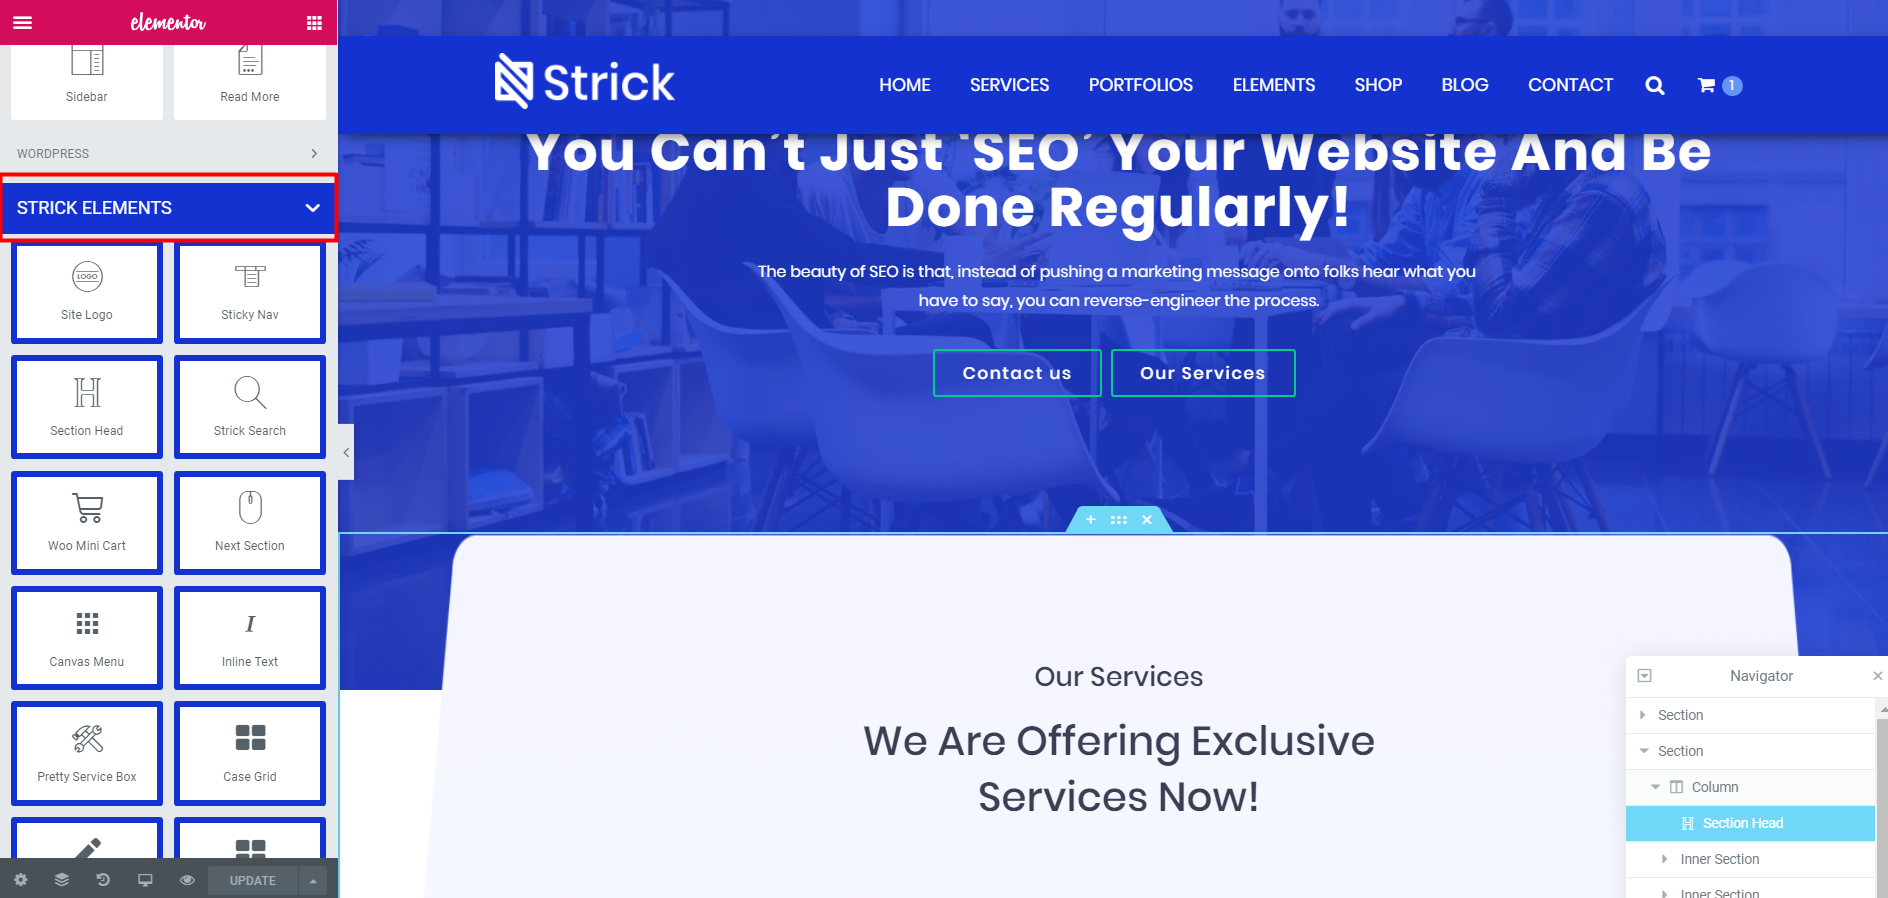
Elementor Page Builder
Elementor is a visual page builder plugin for WordPress enabling the creation of web pages in a live, visual way. This step-by-step guide walks you through how to create a website using Elementor.
How to Use Elementor - Getting Started
If you are an Elementor newbie, this video will help you how to decorate section content in your page.
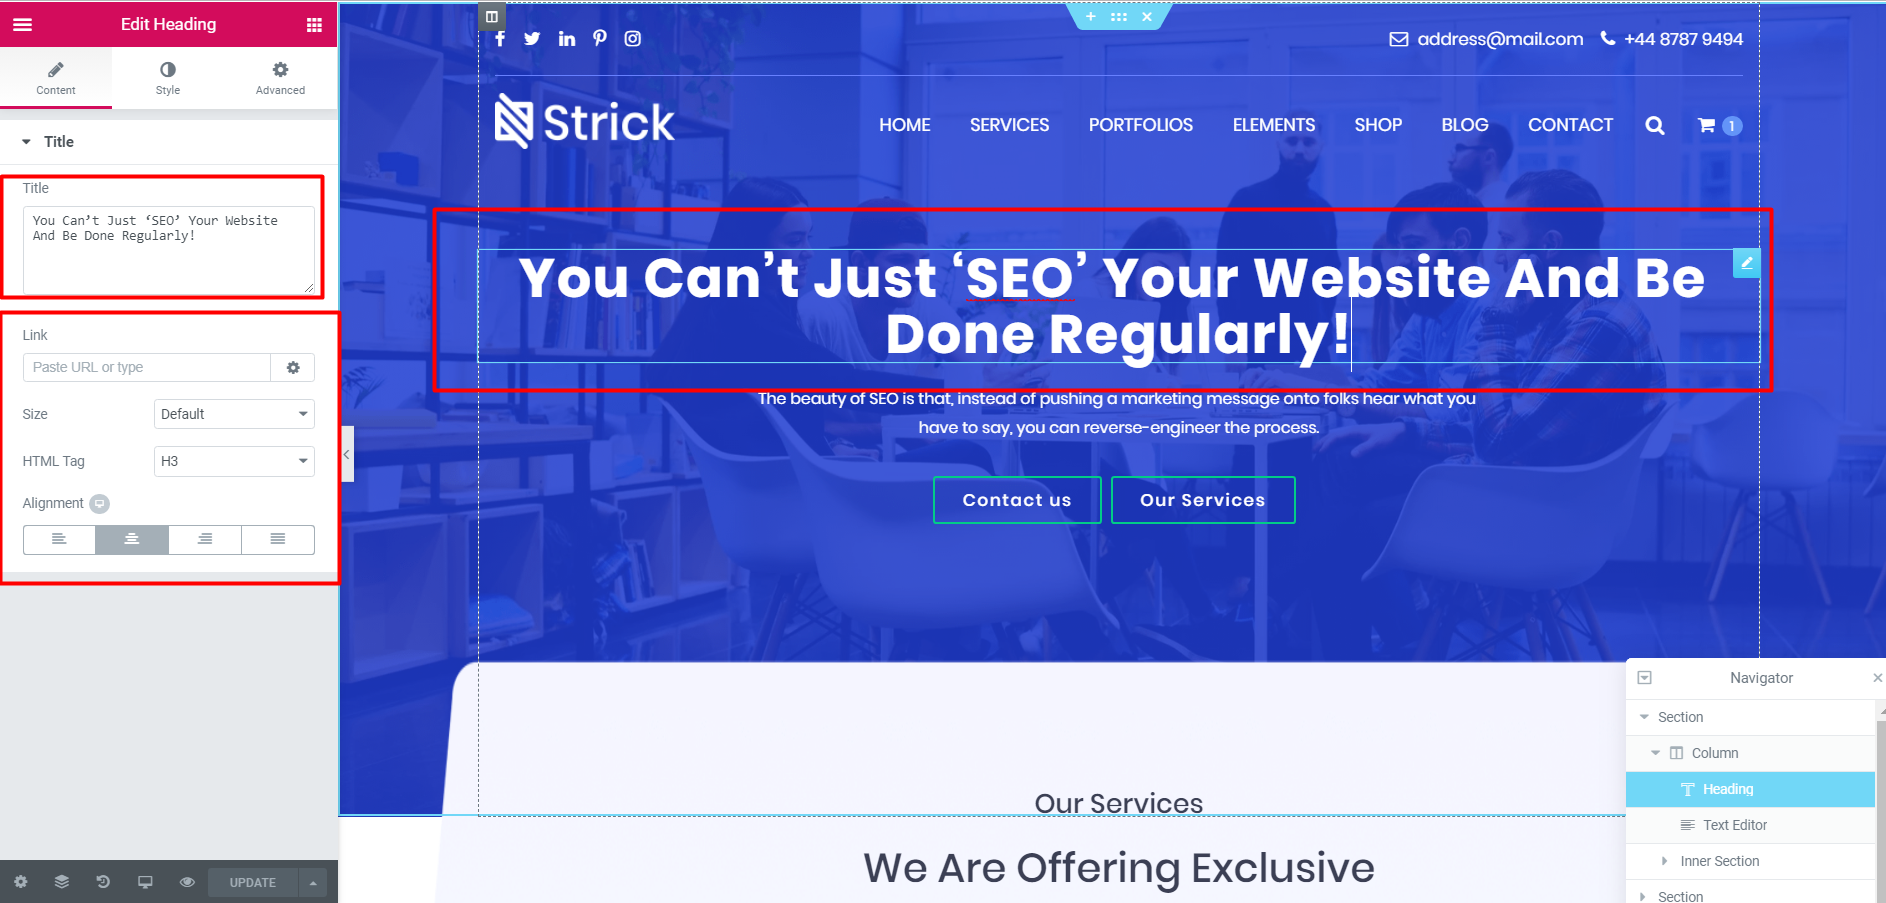
Strick - Screenshoot
Full width section setting
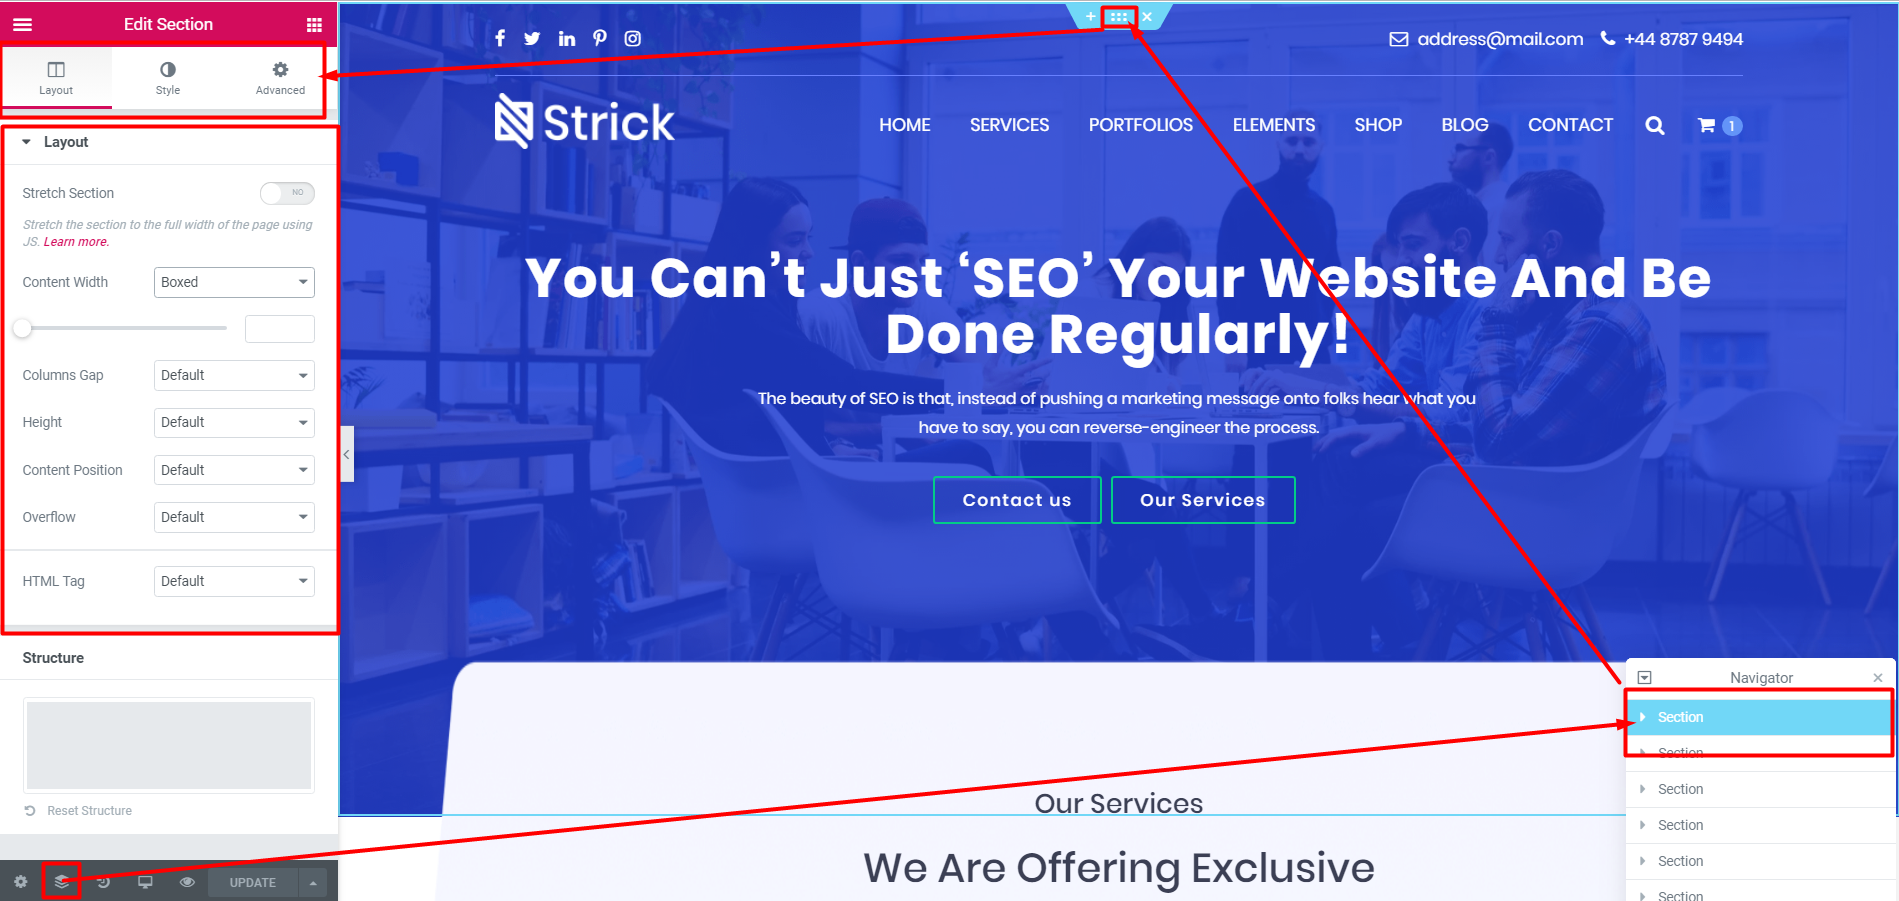
Section Head setting
More Details
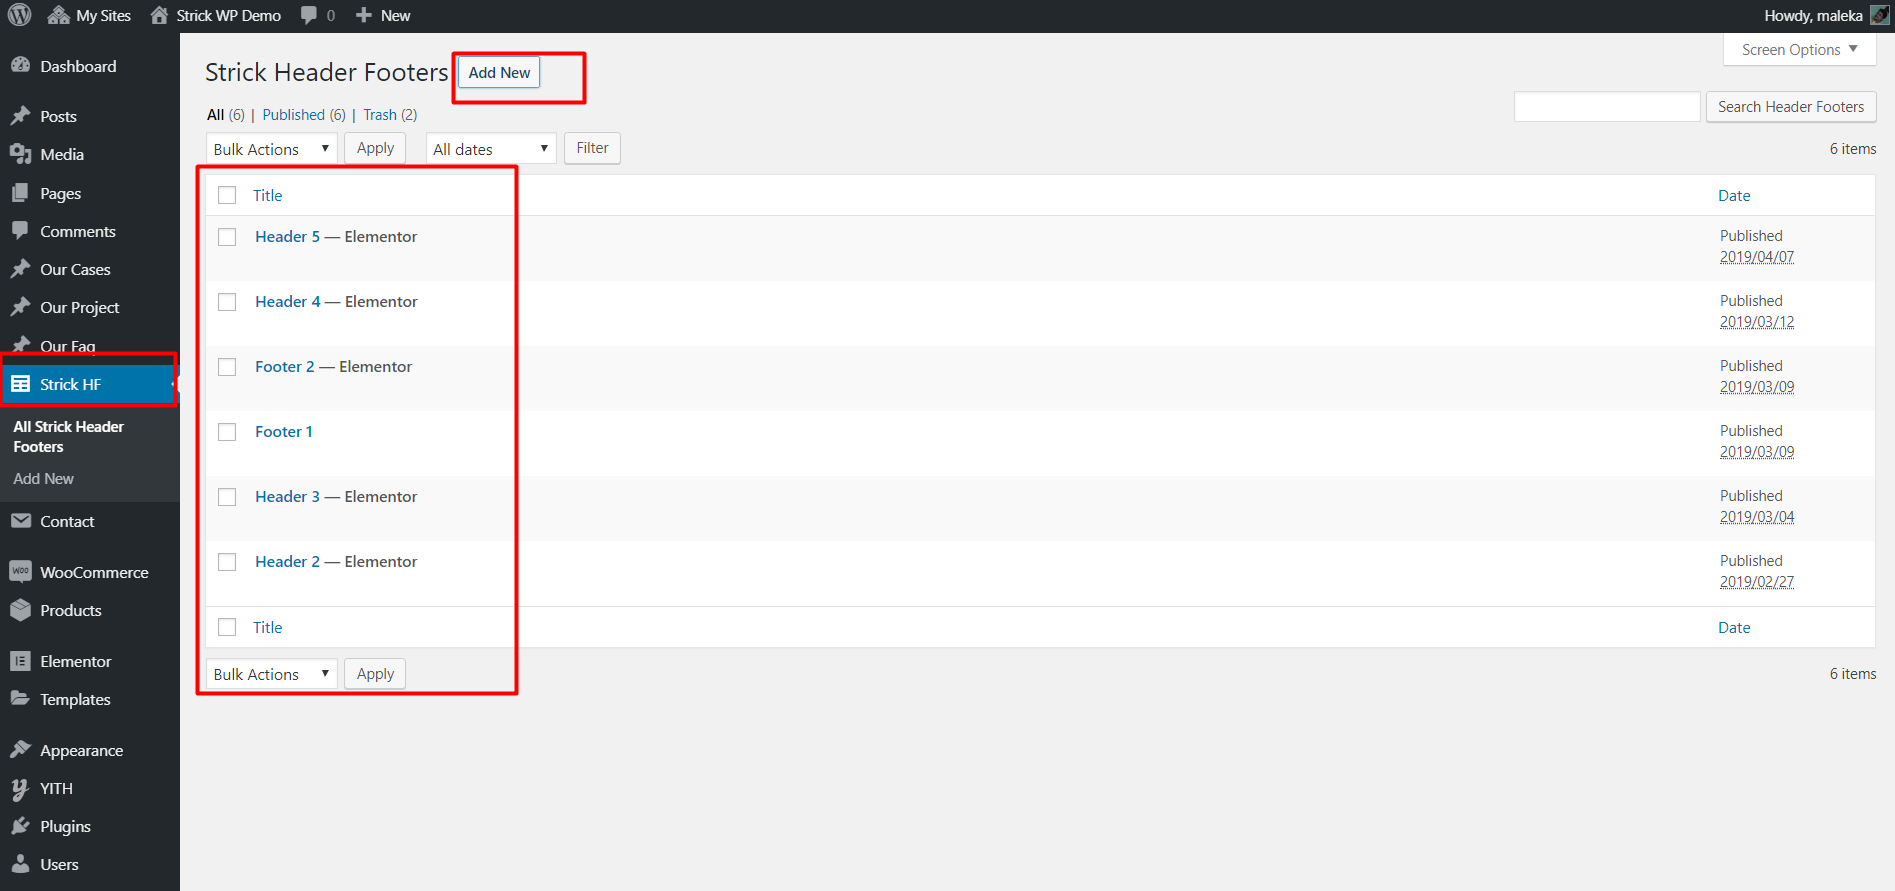
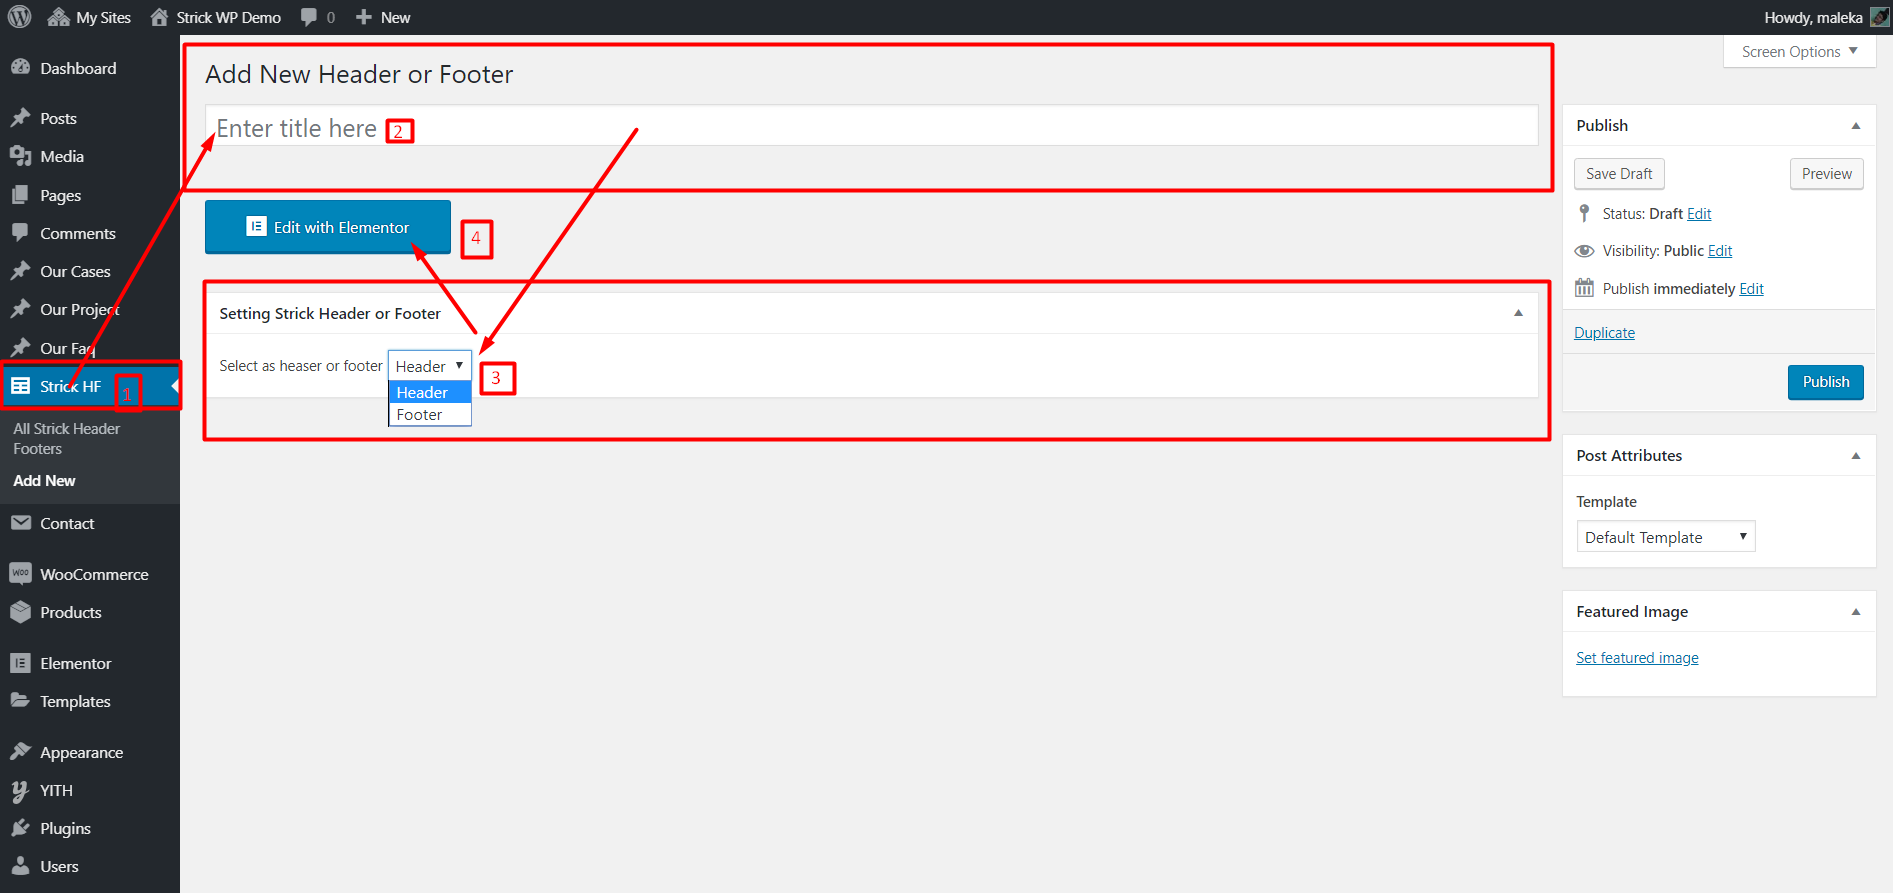
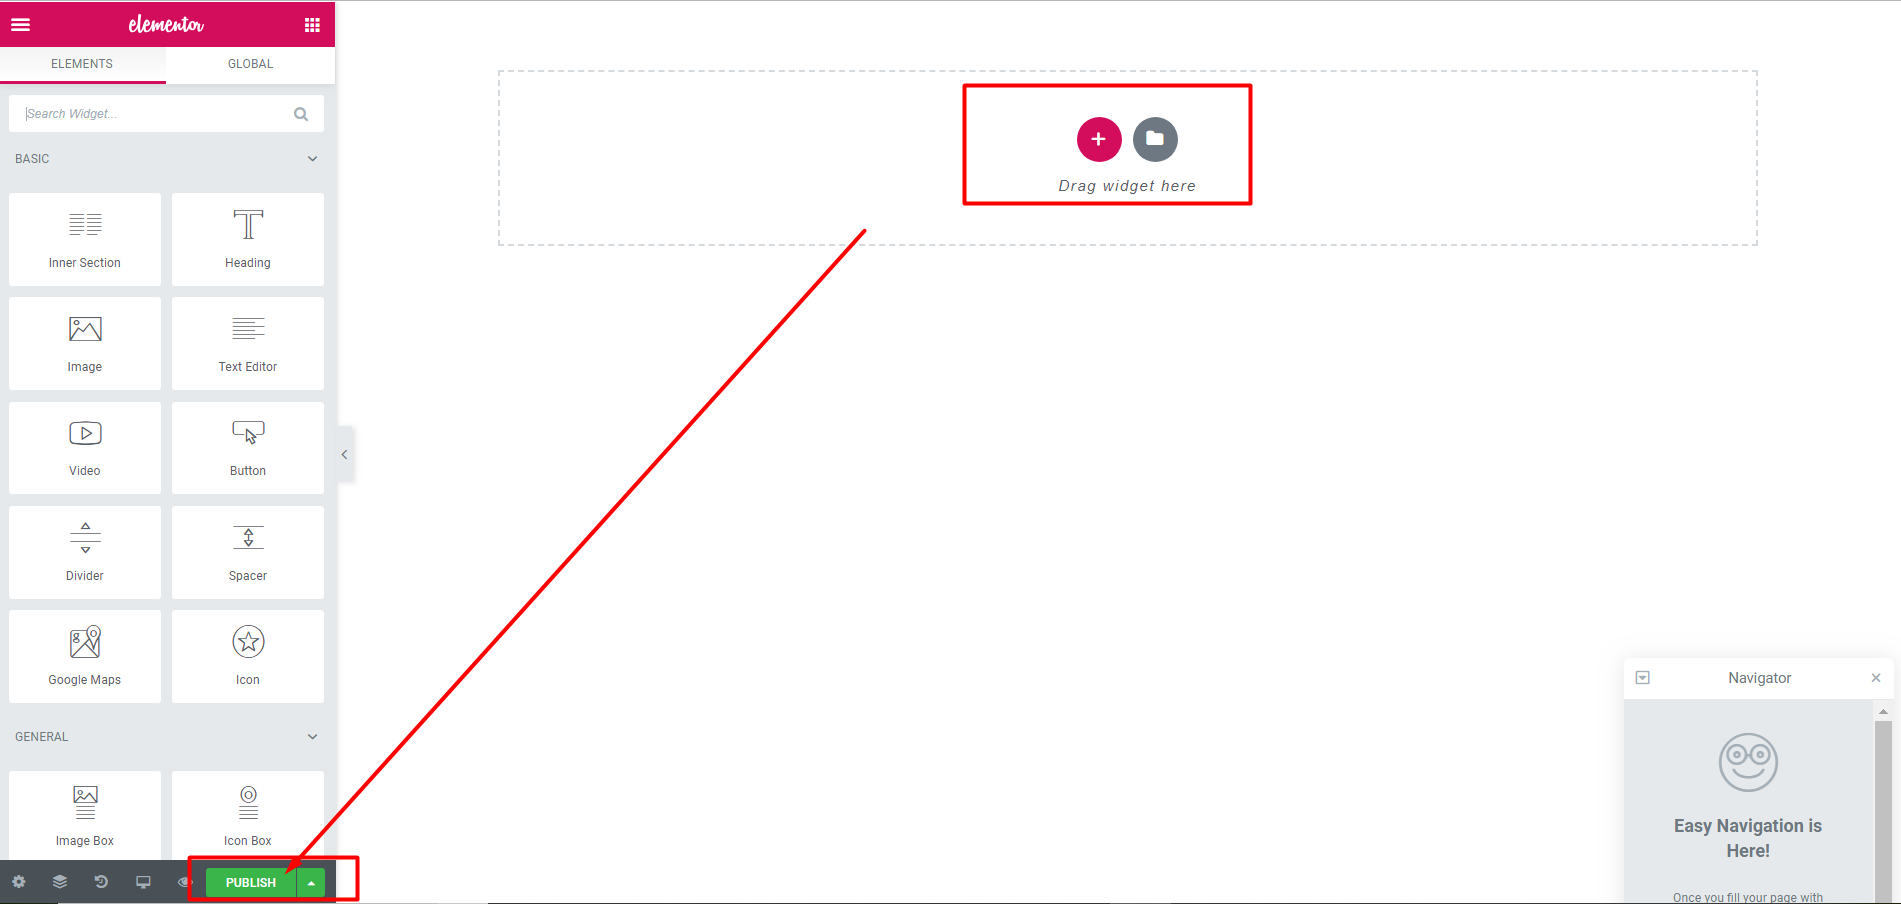
Custom header and footer create
After installation and activating Strick theme and strick master, you can create custom header and footer by elementor page builder for your header and footer.
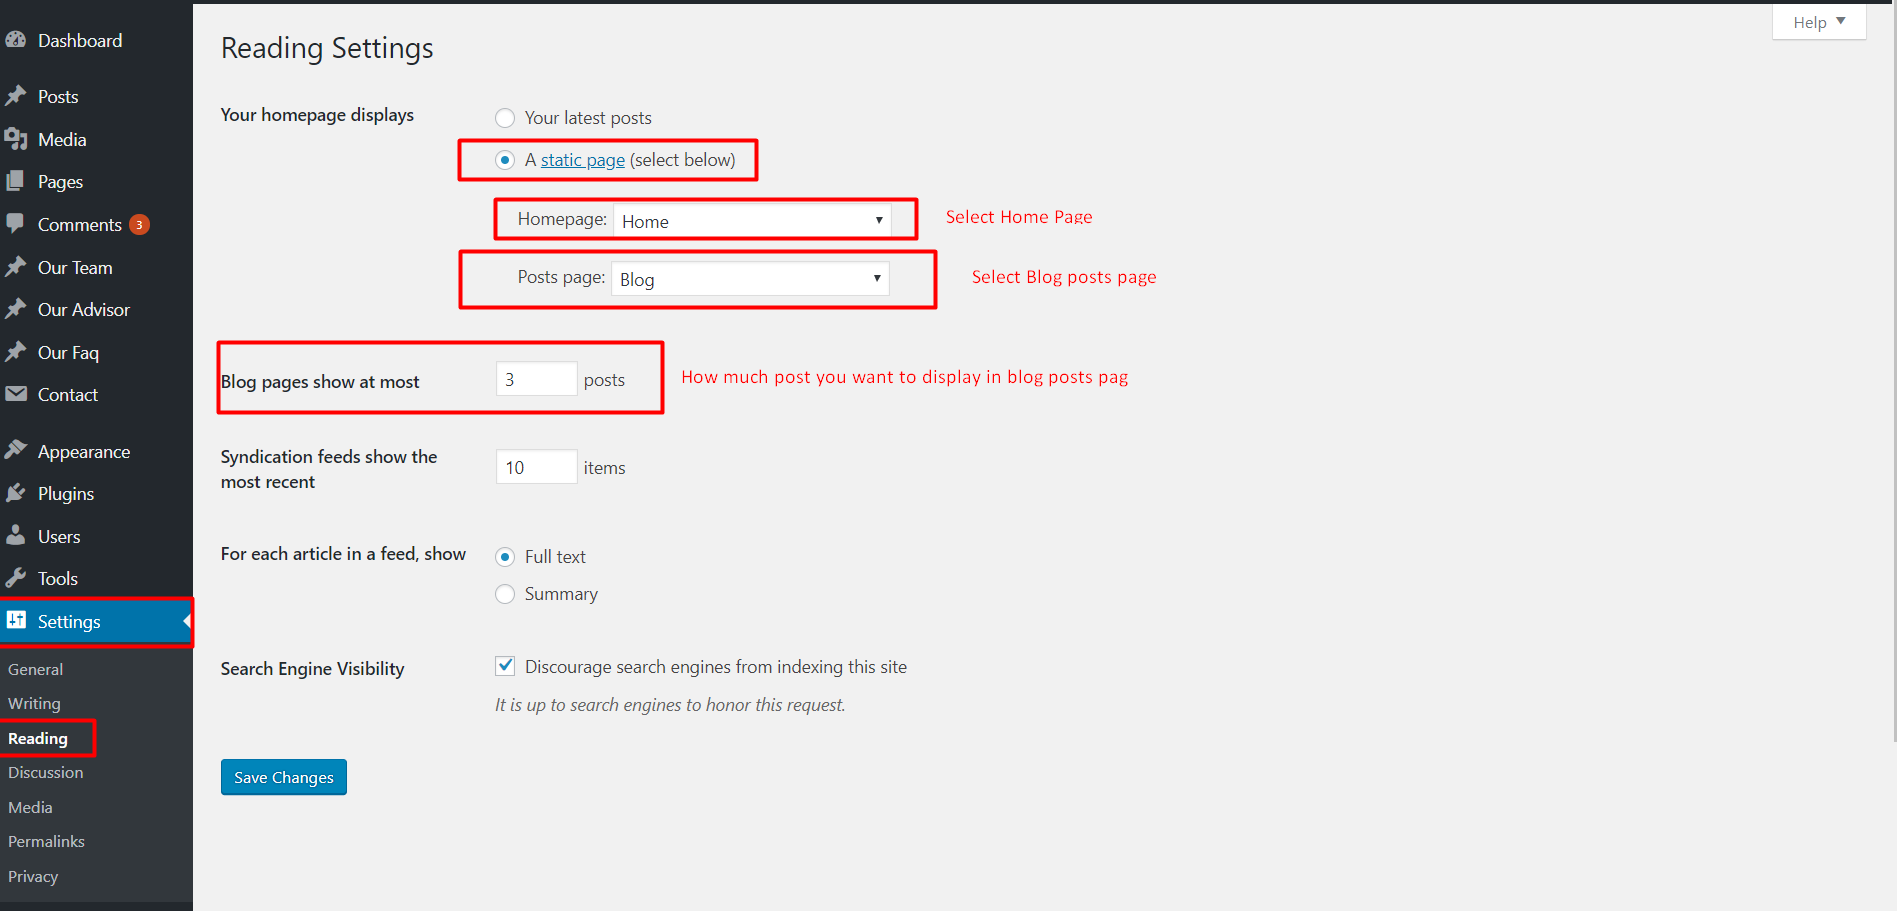
Home Page Setup
After installation and activating STRICK, you need to perform the following tasks to enable landing page.
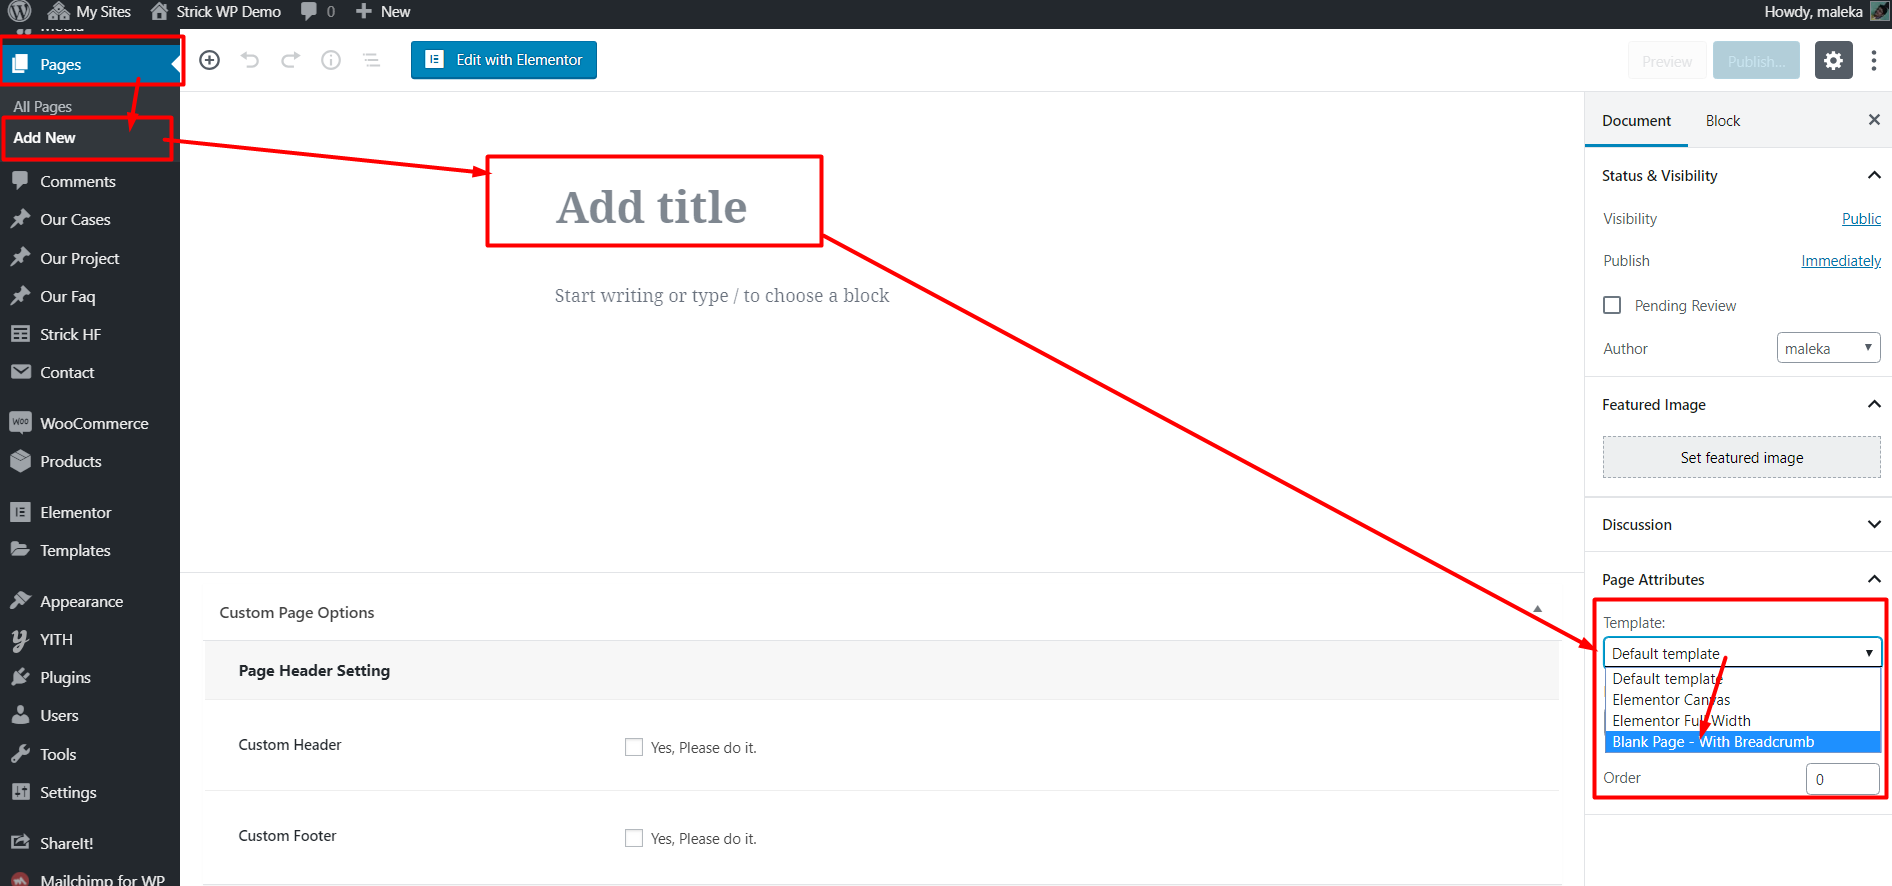
Create new page (Pages Add New) with a title “Home Page or your wish name” and select the Blank Page - Full Width. Now save/publish it.
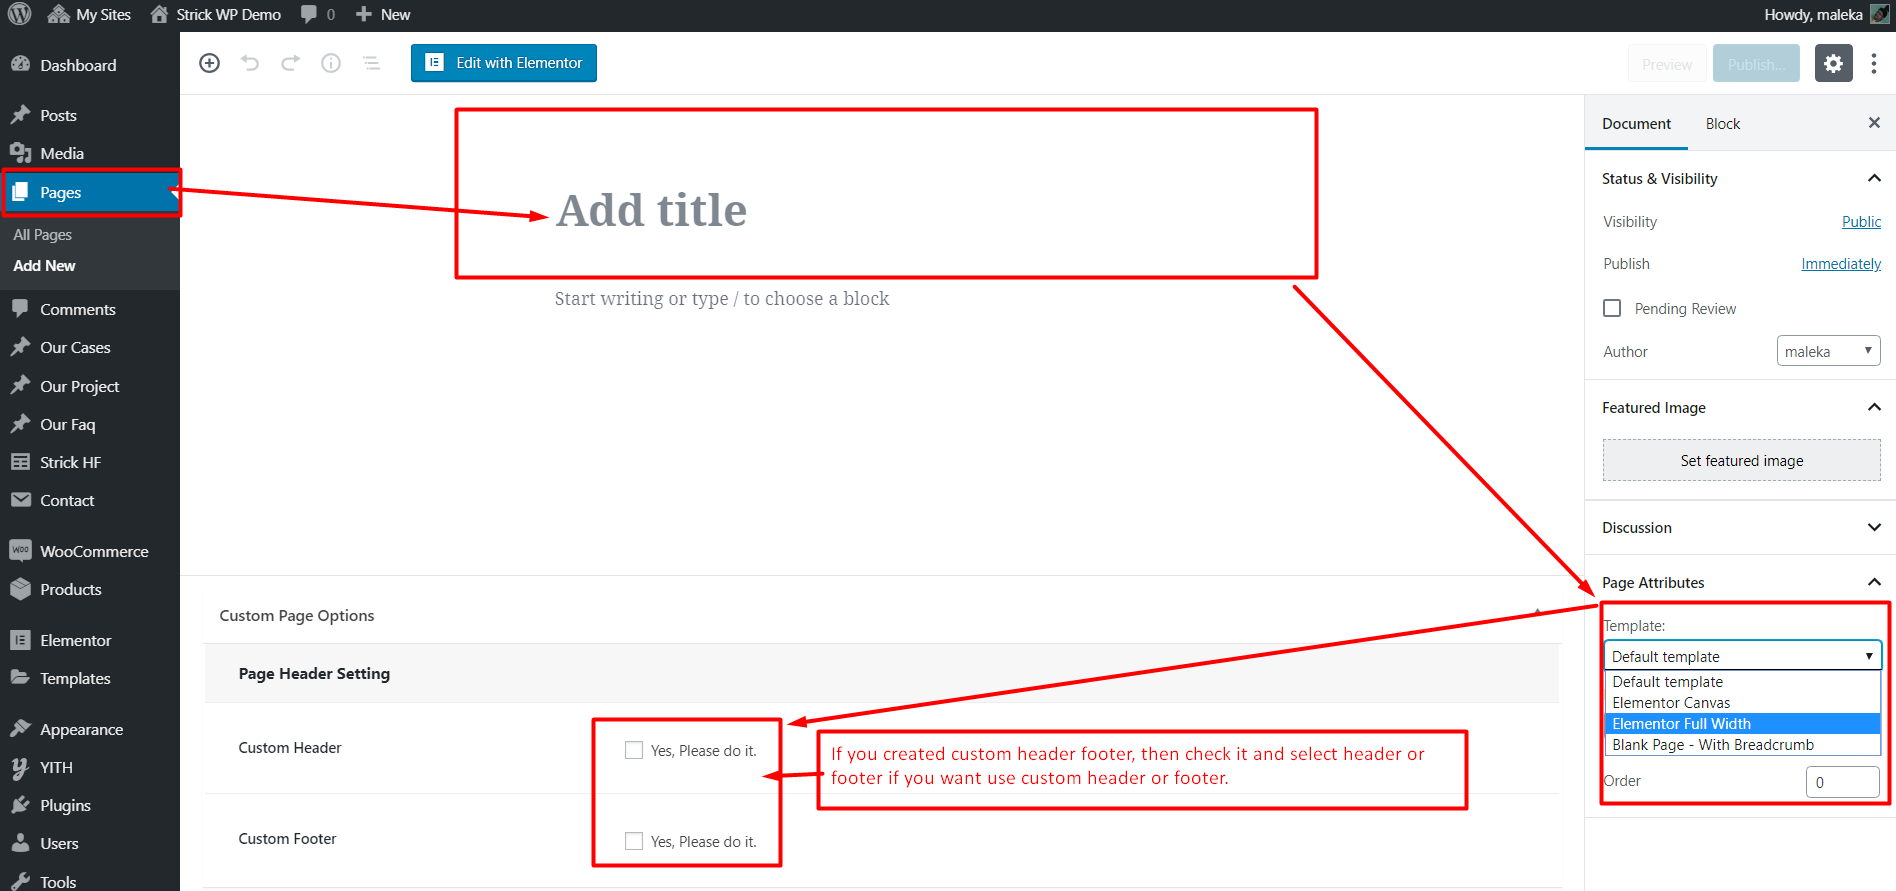
Our Inner or Different Page Templates
Like as home page you will select the page template from the right side page template drop down menu. If you want to default page with sidebar Please select Default Template and if you want to full width page sithout sidebar please select Blank Page - Full Width
OneClick Demo Installation
Go to Appearance Import Demo Data OneClick Demo
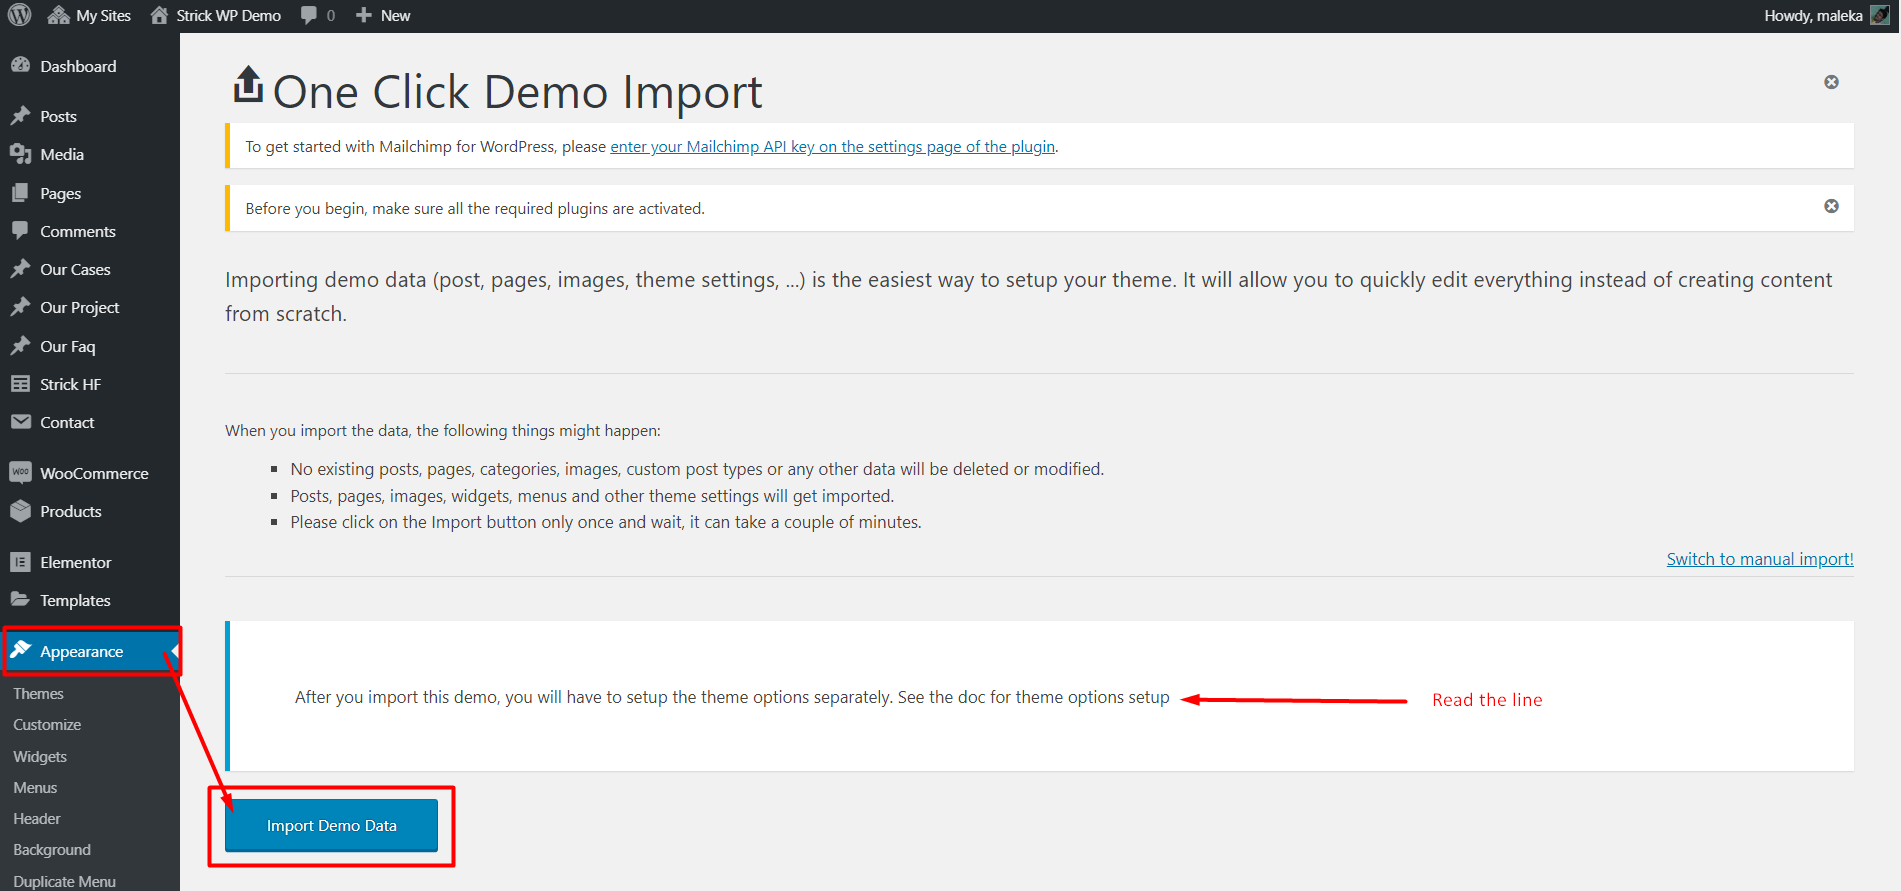
After you import this demo, you will have to setup the theme options separately. See the documentation next step for Theme Options Setting
Theme Options Setting
Theme Options Maximum data was default setting. Where data default value is missing you will setting those.
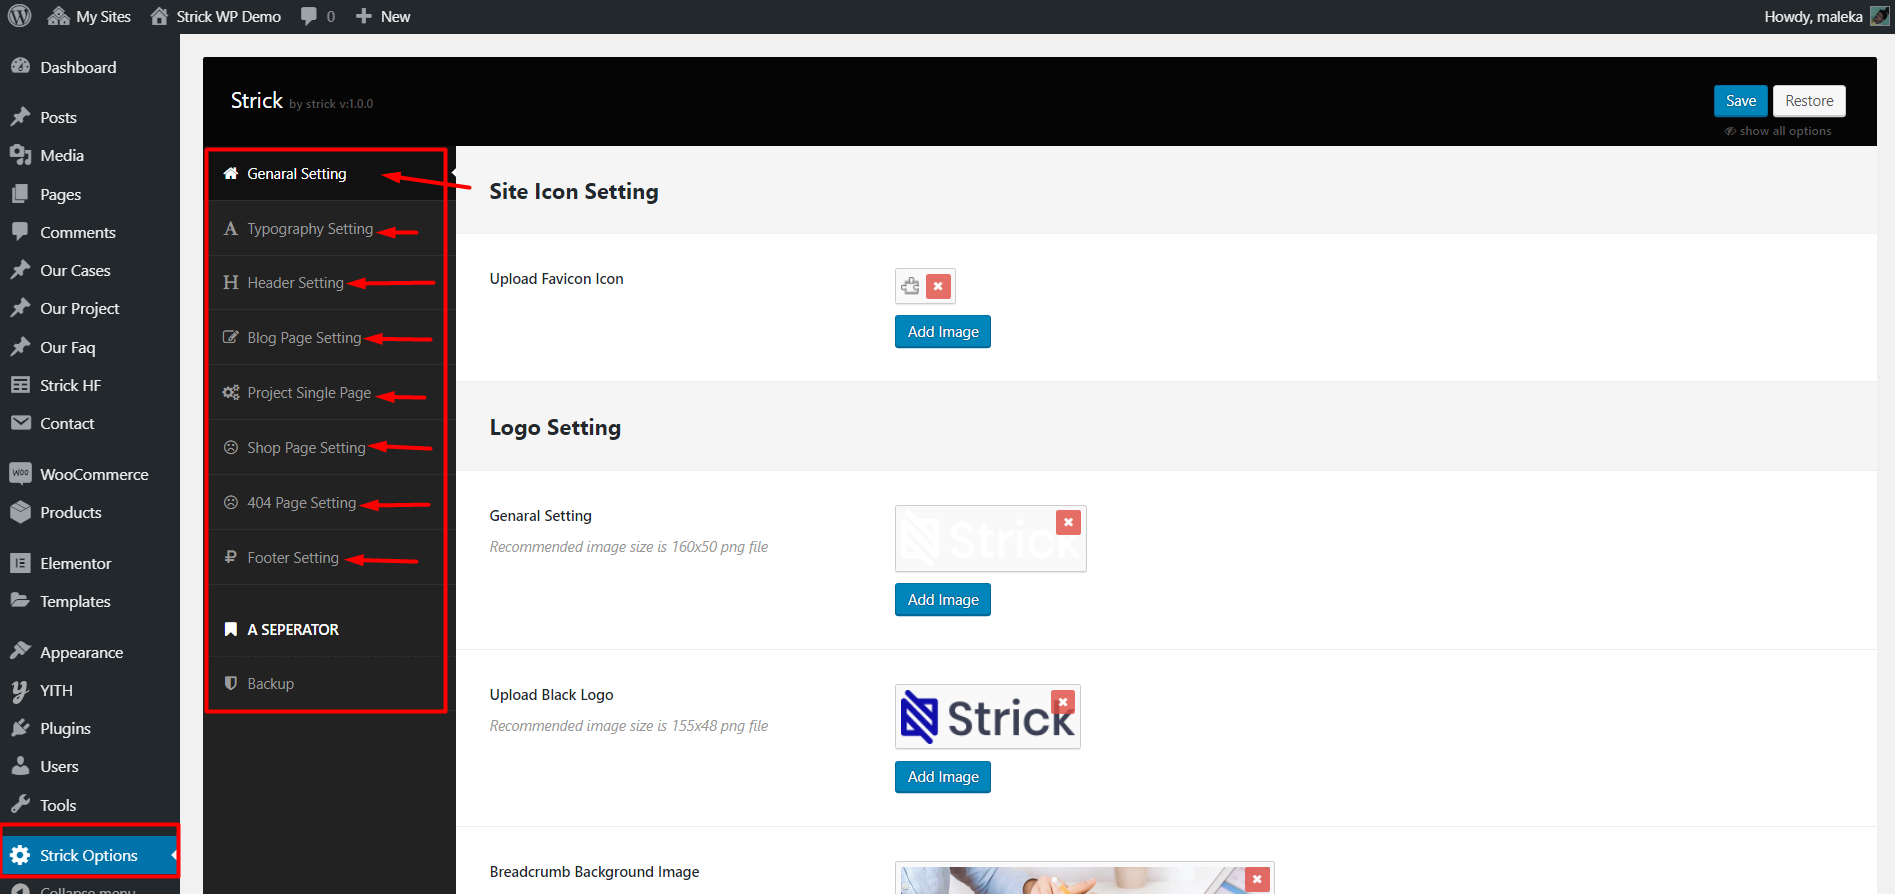
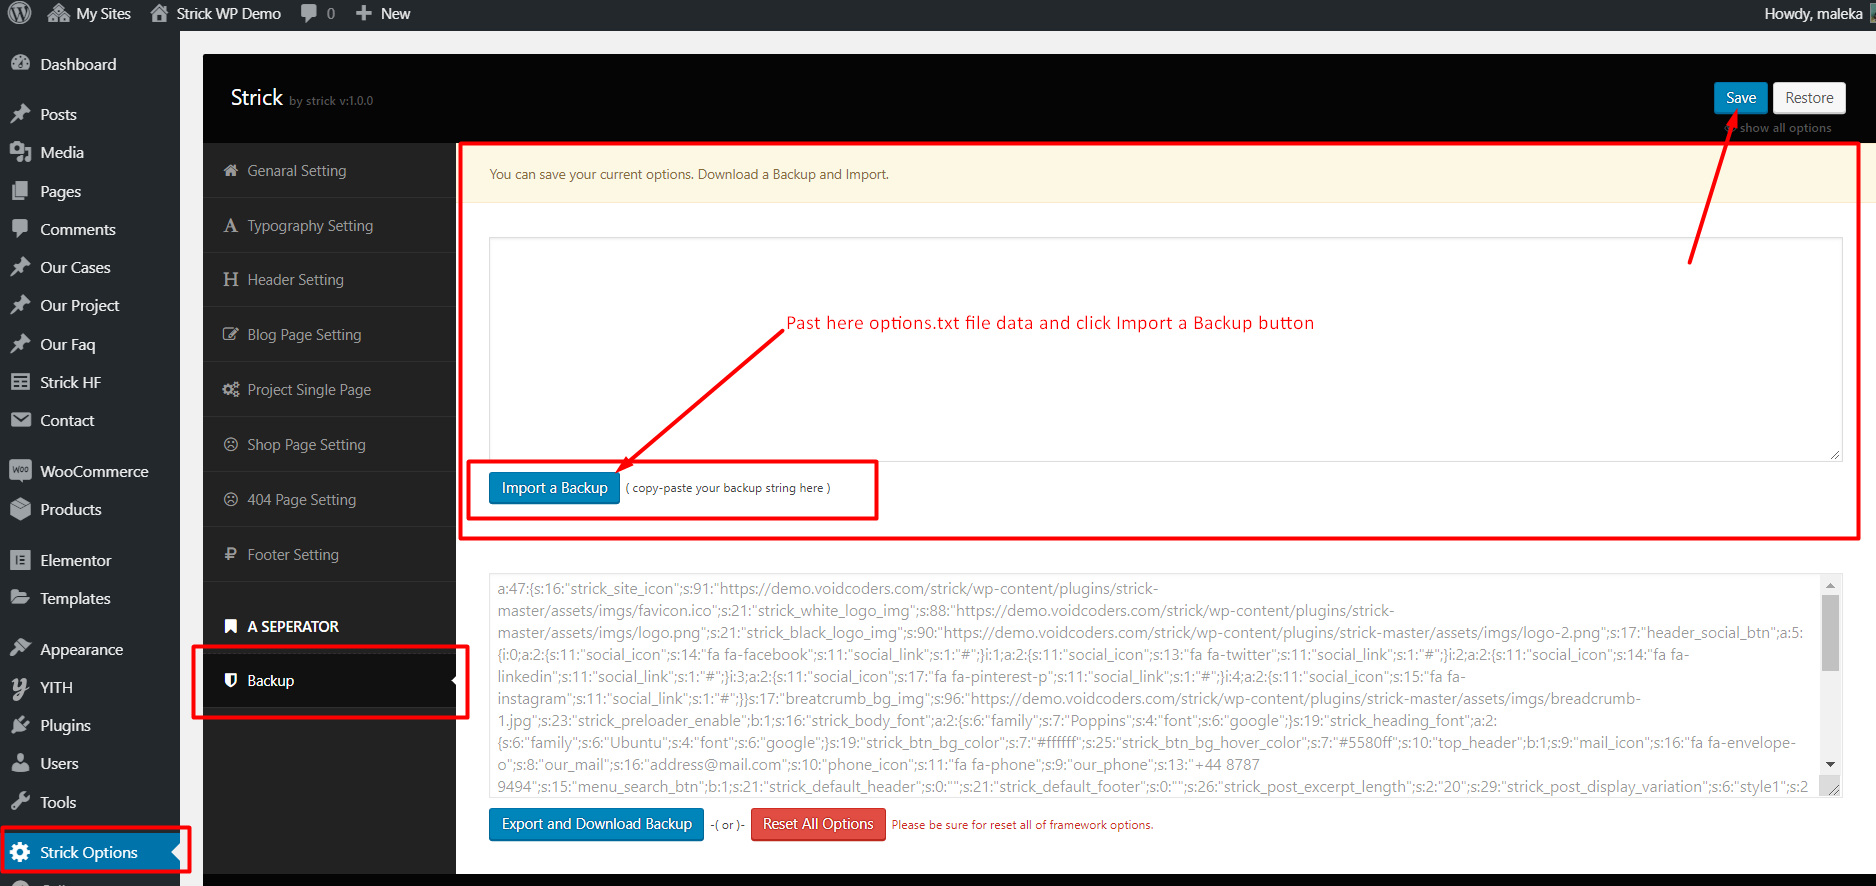
Theme options data
If you want to import demo data manually (though this has been done automatically if you used the one click demo import) Please go to the All files download folder inc Strick Demo Files options.txt, it file open any text editor and copy to past below theme option backup import box.
More Details
End Of Strick Documentation
After seen STRICK documentation. Carefully setup STRICK. If you don't know documentation properly, please knock us. We here for you support